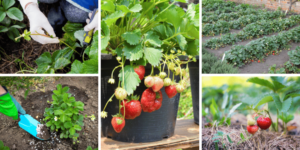
How to Grow Strawberries in Plastic Bottles
Want to enjoy fresh, homegrown strawberries without a big garden? Growing strawberries in plastic bottles is a brilliant, eco-friendly solution that’s perfect for urban gardeners, small-space dwellers, or anyone passionate about sustainability. This innovative method repurposes plastic waste into a thriving mini-garden, delivering juicy berries right to your doorstep. In this step-by-step guide, we’ll show you how to grow strawberries in plastic bottles, optimize your setup for success, and savor the fruits of your labor all while keeping your environmental footprint small.
Why Choose Plastic Bottle Gardening?
Strawberries are a delicious, nutrient-packed treat, and growing them at home saves money and reduces reliance on store-bought produce. By using discarded 2-liter bottles, you’re not just gardening—you’re recycling, cutting waste, and embracing a sustainable lifestyle. Ready to get started? Here’s everything you need to know.
What You’ll Need to Grow Strawberries in Plastic Bottles
Before diving in, gather these essentials:
- Plastic Bottles: 2-liter soda bottles work best.
- Sharp Knife or Scissors: For cutting openings.
- Drill or Nail: To create drainage holes.
- Potting Soil: Opt for a container-specific mix.
- Strawberry Plants or Seeds: Runners are ideal for beginners.
- Water Source: A watering can or bottle will do.
- Optional: String or wire for hanging.
Step 1: Prep Your Plastic Bottles Like a Pro
Start with clean bottles rinse them thoroughly to remove residue and peel off labels. Next, grab your knife or scissors and carefully cut rectangular openings along one side of each bottle. These will be your planting pockets, so leave enough uncut space at the top and bottom to keep the bottle sturdy. Finally, use a drill or nail to poke several small drainage holes in the bottom. Proper drainage prevents soggy roots, a common strawberry killer.
Step 2: Soil and Planting Set the Foundation
Fill each bottle with high-quality potting soil, keeping it loose for airflow and drainage. If you’re using strawberry runners (small rooted plants), gently tuck their roots into the soil through the openings, securing them in place. Prefer seeds? Sow them according to the packet’s depth and spacing instructions, though starting indoors and transplanting later often yields better results. Either way, you’re on track for a bountiful harvest.
Step 3: Watering Tips for Healthy Strawberries
After planting, give your strawberries a good initial watering to settle the soil. Going forward, keep the soil consistently moist but not waterlogged strawberries thrive on balance. Check daily, especially in warm weather, and adjust based on your climate. A simple finger test (stick it an inch into the soil) will tell you when it’s time to water.
Step 4: Positioning for Maximum Growth
Strawberries crave sunlight aim for at least six hours of direct rays daily. Place your bottles on a sunny windowsill, balcony, or patio. Short on space? Hang them! Thread string or wire around the bottle necks and secure them to hooks on a fence, wall, or railing. Just ensure they’re stable against wind gusts for uninterrupted growth.
Step 5: Care and Maintenance Made Easy
Feed your plants every two weeks with a balanced liquid fertilizer during the growing season to boost fruit production. Watch for pests like aphids or signs of disease (yellowing leaves, mold). Catch issues early with organic pest controls or natural remedies like neem oil. Regularly trim dead foliage to keep your strawberry garden thriving.
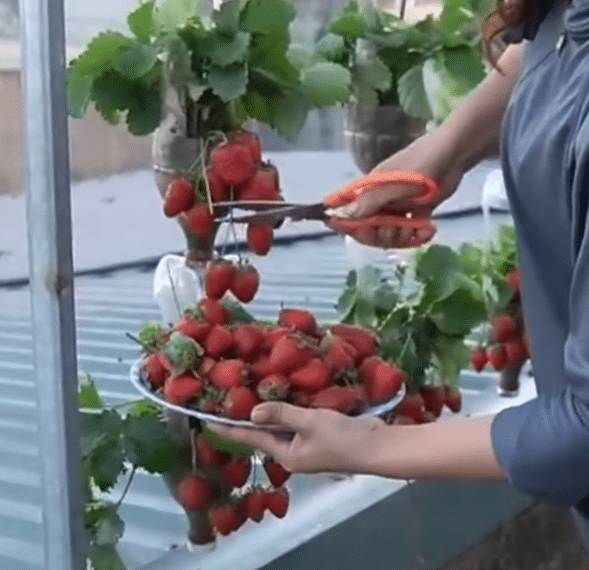
Harvesting Your Homegrown Strawberries
When your berries turn bright red and feel firm, they’re ready! Gently twist or snip them off to avoid harming the plant. Enjoy them fresh, toss them into desserts, or preserve them as jam. Nothing beats the taste of strawberries you’ve grown yourself.
Conclusion: Start Your Plastic Bottle Strawberry Garden Today
Growing strawberries in plastic bottles is a win-win: it’s practical, sustainable, and perfect for any space big or small. This DIY project transforms waste into a productive garden, delivering fresh fruit while shrinking your ecological impact. Ready to try it? Gather your supplies, follow these steps, and enjoy the sweet rewards. Share your progress or favorite strawberry recipes below I’d love to hear how it goes!